
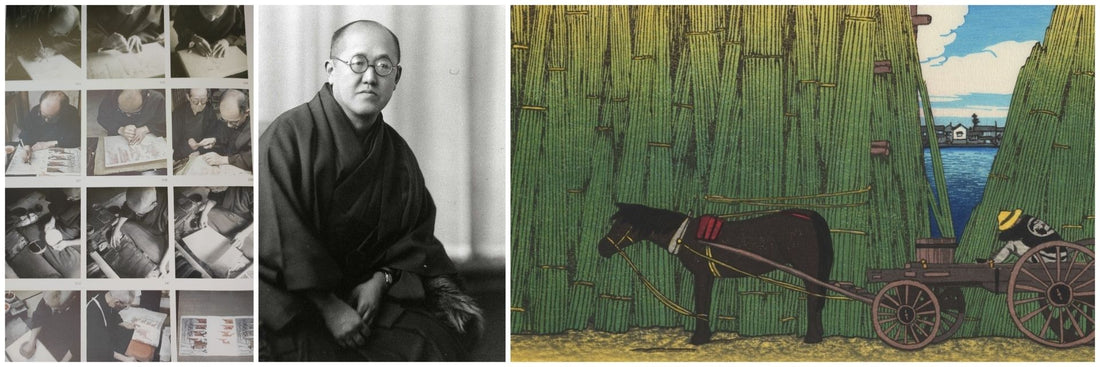
Printmaking explained by Kawase Hasui
Have you ever wondered how the Japanese woodblock prints that hang in the world's great museums were actually made? Behind every work by Kawase Hasui, the master of shin-hanga (see our biography of Kawase Hasui), lies a fascinating craft involving four specialists and weeks of meticulous work.
Based on Brigitte Koyama-Richard's book and on rare archives from the Ōta City Folk Museum in Tokyo, this article takes you behind the scenes of a technique that has won admirers from Paris to New York.

Kawase Hasui at home in Magome.
What Is Shin-hanga?
Shin-hanga ("new prints") is an early 20th-century Japanese art movement that reinvented woodblock printmaking. Edo-period prints were often seen as entertainment or educational objects; shin-hanga prints were conceived first and foremost as works of art.
The revival was orchestrated by Watanabe Shōzaburō, a visionary publisher who gathered the most talented artists and craftsmen of his time.
The Four Craftsmen Behind a Print
Each print was the result of a close collaboration between:
- The publisher (hanmoto): Watanabe Shōzaburō, who financed and coordinated the work
- The painter: Kawase Hasui, who designed the landscapes
- The carver: Maeda Kentarō, master of precision
- The printer: Ono Gintarō, magician of colour
The documentary A Life in Prints (Hanga ni ikiru) beautifully illustrates this collaboration. Hasui is the name everyone remembers today, but the meticulous work of his collaborators deserves recognition too.
The 3 Steps of Making a Shin-hanga Print
Step 1: The Preparatory Drawing
Kawase Hasui travelled all over Japan in search of inspiring landscapes. Sketchbook in hand, he drew the scenes that caught his eye in black pencil, sometimes adding touches of colour.
In the evening, he reworked his sketches on larger sheets in the ōban format (about 36 × 24 cm), the standard size for prints. Once satisfied, he showed the drawing to Watanabe.
The publisher then assessed its commercial potential. Producing a print was a major investment: the craftsmen had to be paid in advance, and the materials (fine paper, cherry wood, specialised tools) had to be financed.
Once the design was approved, Hasui carefully traced its main lines in Indian ink on a very thin sheet of Japanese paper, which he then handed to the carver.
Step 2: Carving the Woodblocks (about two weeks)
Master carver Maeda Kentarō received the traced drawing and spent about two weeks carving the first complete block, the key block (omohan).
Why cherry wood?
Maeda worked with cherry wood, a material with exceptional qualities:
- a fine grain that allows extreme precision;
- little expansion when damp;
- good stability as it dries.
Watanabe bought these blocks well in advance and let them dry for three years before use.
The carving process
- The carver coated the block with a traditional rice paste (wanori or yamatonori).
- He pressed the traced drawing face down onto the wood.
- By gently rubbing the paper with his fingers, he transferred the ink lines onto the wood while the paper disintegrated.
- The original drawing was destroyed in the process: there was no going back.
- Maeda first incised the outlines, then carefully cut away the surrounding wood to leave the lines in relief.
Once the key block was finished, he used it to pull monochrome proofs, which Hasui coloured by hand to indicate the exact hues he wanted.
The colour blocks
The carver then cut additional blocks, one for each colour. To guarantee perfect alignment during printing, he added two registration marks (kentō) to every block:
- one in the lower right corner (kagi kentō);
- another higher up on the same side (hikitsuke kentō).
Step 3: Printing
The printer carefully prepared his tools, starting with his baren, a hand pad he made himself by layering paper, lacquer and fine fabric around a coil of braided bamboo-sheath strips.
Preparing the materials
Beside him he laid out:
- his pigments, diluted in water;
- sheets of Echizen washi paper, sized with dōsa (a mixture of animal glue and alum) and dampened;
- his solid stick of Indian ink, essential for the outlines.
Pigments traditionally came from minerals and plants, but by the late 19th century brighter synthetic dyes had become available.
The printing process
The printer moistened the carved blocks with a horsehair brush (singed and polished on sharkskin to keep it from deforming).
Colours were printed one after the other, from the lightest to the darkest:
- each sheet was aligned with the kentō marks;
- it was laid on the inked block;
- using the baren, the printer rubbed the back of the paper in circular movements so the pigment transferred evenly.
The gomazuri innovation
Watanabe Shōzaburō introduced a technique called gomazuri, which deliberately left the circular marks of the baren visible on the print, giving shin-hanga works their distinctive texture.
Seated cross-legged at his sloping wooden table (suridai), the printer constantly checked the registration of each colour. Once every layer had been printed, the print was complete: a testament to patience, precision and artistic mastery.

Images from the film Color mokuhanga no dekiru made, reproduced in Brigitte Koyama-Richard's book Kawase Hasui, le poète du paysage.
Rare Archives from the Ōta City Folk Museum
The Ōta City Folk Museum in Tokyo, in the ward where Hasui lived, holds remarkable archives on his creative process. Here are a few examples.

Hiraizumi Konjikidō (3 May 1955)
On this day, Hasui began painting the original for his last great work, "Hiraizumi Konjikidō". The museum keeps both the preparatory drawing and the finished print, so you can compare the artist's first vision with the printed result.

→ Order a reproduction of Hiraizumi Konjikidō
Shiobara Hatashita (1945)

The preparatory drawing from sketchbook no. 66 shows the spontaneity of Hasui's line in the field, next to the perfectly balanced composition of the final print (source: Ota City Folk Museum).
House at the Ibaraki Christian School

The print and its preparatory drawing (source: Ōta City Folk Museum).
Miho no Matsubara

This famous view of the pine beach shows how Hasui turned a quick sketch into a poetic landscape with a unique atmosphere.
→ See the Miho no Matsubara print
Why Do Kawase Hasui's Prints Still Fascinate Us?
Beyond the beauty of the landscapes, it is all this invisible craftsmanship that gives each print its value. Every shin-hanga impression carries:
- weeks of work by four craftsmen;
- techniques handed down over generations;
- carefully selected natural materials;
- a collaborative approach unique in art history.
This authenticity is what still captivates collectors around the world. To see this craft applied to his favourite subject, read Kawase Hasui Snow Prints: 11 Winter Scenes of Japan.
Go Further
Would you like a faithful reproduction of a Kawase Hasui print? Discover our high-definition prints, carefully produced to bring out the beauty of the originals.
→ Explore our Kawase Hasui collection
Recommended Resources
- Documentary: A Life in Prints: Kawase Hasui (Hanga ni ikiru)
- Book: Kawase Hasui, le poète du paysage, Brigitte Koyama-Richard
- Museum: Ota City Folk Museum (Tokyo)
This article is based on Brigitte Koyama-Richard's book and on images from the film "Color mokuhanga no dekiru made". Many thanks to the Ōta City Folk Museum for its photographic archives.